How to Cut Asian Hair: What Actually Works (And What Stylists Wish You Knew)
POSTED ON March 1, 2026
There’s a particular kind of disappointment that comes from leaving a salon with hair that looks nothing like what you asked for. If you have Asian hair, you probably know it well. The cut looked great on the reference photo. It looked fine in the chair. But somewhere between the salon mirror and your bathroom the next morning, something went wrong.
The problem is almost never the style itself. It’s the technique, or more specifically, the lack of technique, tailored to how Asian hair actually behaves. Asian hair is thicker, straighter, and denser than most other hair types, and knowing how to cut Asian hair correctly, with the right sectioning, the right finishing moves, and a proper understanding of where the weight sits, is what makes the difference between a cut that lasts and one that falls apart by morning. This guide shows you exactly how.
Best Tools to Cut Thick Asian Hair at Home
The tools matter more with Asian hair than most people expect. The density means every flaw shows, and a rough cut on thick straight hair is surprisingly hard to disguise.
What you actually need:
- Sharp haircutting scissors — not kitchen scissors, not craft scissors. Dull blades press and crush the hair shaft rather than slicing through it cleanly, which means split ends and an uneven finish before you’ve even started.
- A fine-tooth tail comb — the pointed metal end is invaluable for making clean, precise partings through dense hair.
- At least six sectioning clips to keep hair separated as you work.
- A spray bottle with water to keep sections damp without soaking them.
- Thinning shears — optional, but useful for finishing. The keyword is finishing. More on this later.
- Two mirrors, or one large mirror, can be angled to check the back. Asian hair’s weight distribution is clearly visible from behind, and you need to see it.
A note on scissors worth emphasising: one decent pair of haircutting shears from a beauty supply store will outperform any household scissors you own. The investment is small, and the difference is immediate.
How to Prepare Asian Hair Before Cutting
1. Work with damp hair, not freshly washed
Fully wet hair stretches, it hangs longer and heavier than it actually is once dry, which means you can easily cut more length than you meant to. Lightly mist the hair with a spray bottle instead, and refresh sections as they dry while you work. It sounds like a small thing, but it changes how reliably the finished length matches what you were aiming for.
2. Comb through everything before the scissors come out
Asian hair’s density makes tangles more likely to hide. When a tangle catches mid-cut, some strands pull tighter than others, and the result is a line that looks uneven once the hair relaxes and settles. A thorough comb-through on every section before cutting saves a lot of frustration later.
3. Good sectioning is where the accuracy actually comes from
Sectioning can feel like the tedious part before the ‘real’ cutting starts. With thick Asian hair, it’s the opposite; small, clean sections are what give you control. Working through large unmanaged blocks of hair is essentially guesswork, and on dense straight hair, the results show immediately.
For most cuts, divide the hair into four quadrants:
- Part straight down the centre from the forehead to the nape.
- Make a horizontal parting from ear to ear across the crown.
- Clip all four sections away from the work area.
- Begin at the nape and work upward, releasing one section at a time.
Working bottom to top isn’t arbitrary. The lowest sections establish the guide length that everything above will follow. Get those right, and the rest falls into place.
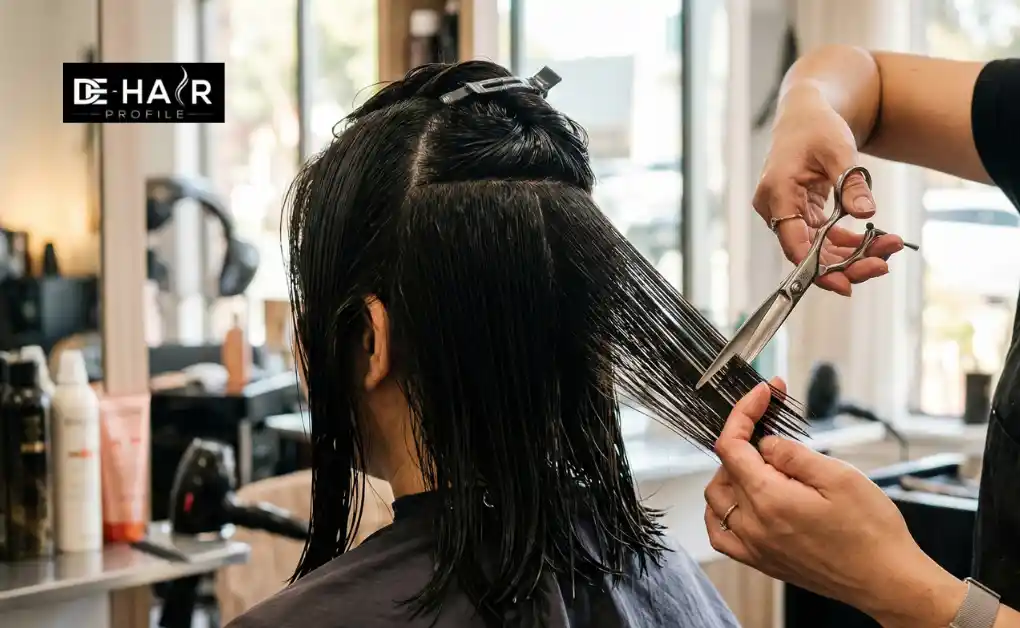
How to Cut Asian Hair: The Method That Works

1. Start at the nape and set your guide length
Release the lowest section at the nape. Comb it completely smooth, then hold it between your index and middle fingers at the length you want to cut to. This first cut is your anchor; everything else in the haircut will be measured against it.
Keep your fingers horizontal for a clean, level baseline. Angle them slightly, fingers dropping toward the centre, and you’ll introduce a gentle graduation that makes the ends curve inward naturally as the hair dries. That’s not a mistake; it’s a technique worth using deliberately for bobs and short asian hair, which can easily look flat or boxy without proper graduation.
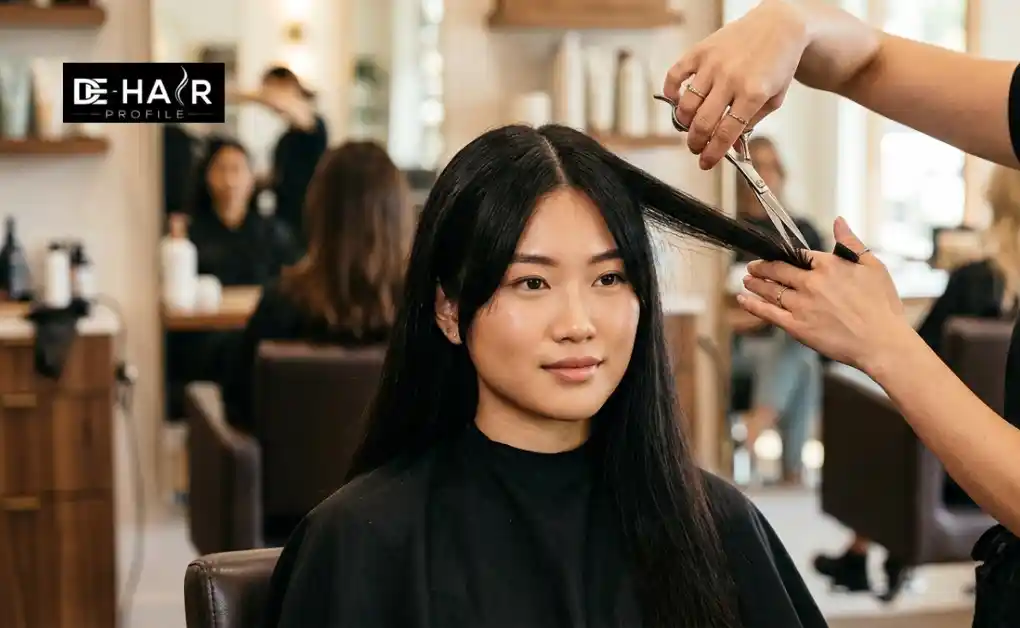
2. Point cut the ends
This single change makes more difference than almost anything else, and it’s the one most people skip.
Cutting straight across Asian hair creates a hard, heavy perimeter. The hair’s density amplifies the effect; it ends up looking thick and block-like rather than shaped. Instead, hold the scissors vertically, tips pointing toward the hair, and make small snipping motions into the ends at roughly 45 degrees. Move along the section, doing this rather than making one clean horizontal cut.
Point cutting softens the edge, removes the harshness, and gives the hair a natural finish rather than a sculpted one. It takes a couple of extra minutes per section, and the difference is worth it every time.
3. Work upward, one section at a time
Release the next horizontal section, comb it down over the cut guide below, and trim it to match. Take sections thin enough that you can see the guide through the hair, roughly one to two centimetres works well for most Asian hair densities.
Hold the hair at a consistent angle as you cut. Pulling sections outward away from the head builds in layers, whether you intend them or not. For a clean one-length result, keep the hair combed straight down before each cut and save the outward angles for when you’re deliberately adding layers.
4. Check the balance before you touch the sides
Pull equal amounts of hair from each side of the back and hold them together at the centre. Any length difference shows up immediately, and Asian hair makes even a small discrepancy obvious once it’s dry. Catching this now is far easier than correcting it after the sides are done.
5. Blend the sides into the back
Bring the side sections down. Take a small amount from your back guide and hold it alongside the side section, cut the side to match. This creates a seamless perimeter with no visible join between the panels.
For bobs or cuts where the sides angle upward toward the back, gradually increase the angle as you move toward the back of the head. A sudden jump creates a visible step in the perimeter that’s difficult to fix cleanly.
6. Remove weight from the interior
Most home cuts skip this, and it’s exactly why professionally cut Asian hair looks so different from a DIY result.
Internal weight removal means thinning the underneath and interior of the hair, work that’s invisible from the outside but that completely transforms how the hair moves and sits. Without it, even a well-cut shape looks flat, boxy, and heavy. With it, the same cut has lightness and real movement.
Using thinning shears or a slide-cutting technique, work through the interior sections from mid-shaft down. Stay at least three to four centimetres from the roots, removing weight too close to the root leaves the hair without structural support, and it ends up sitting shapeless.
For slide cutting, open the scissors slightly and glide them down the strand from mid-shaft to the ends. The weight comes out gradually as the blade travels, giving more control than thinning shears and being gentler on the hair.
Start with less than you think you need. You can always take more out; you can’t put it back.
If you want a professional haircut without the effort, our stylists at DE Hair Profile specialise in Asian hair and understand exactly how it moves, sits, and responds to different cutting techniques.
How to Cut a Fringe on Asian Hair (Without Cutting Too Short)
A fringe on Asian hair is its own conversation. The hair grows fast, the density makes the line read strongly, and because it’s so straight, there’s almost no margin for cutting too short.
1. Getting a blunt fringe right
Section out a triangular panel from the outer corners of the eyebrows up toward the crown. Comb it straight down and hold it between your fingers at your target length.
Asian hair springs upward as it dries, a fringe sitting at the middle of the eyebrow when damp will often land above the brow once dry. Cut longer than your intended final length, let it dry fully, then refine. It’s a much better situation than the alternative.
Point cut the fringe edge after the initial cut. A clean horizontal cut across dense hair reads like a shelf across the forehead, the point cutting removes that rigidity without changing where the fringe sits.
2. Curtain bangs
Section the fringe the same way, then part it at the centre. Hold each side at an outward angle away from the face as you cut; this creates the longer-toward-the-temples sweep naturally without needing to do anything clever with the scissors.
Run thinning shears lightly through the inner, scalp-facing side of the fringe to reduce bulk without touching the outer line. Asian hair’s density can make curtain bangs sit heavy and stiff without this, which defeats the whole soft, effortless look they’re supposed to give.
3. Trimming at home between salon visits
Cut dry, not damp. Dry hair sits exactly where it will in real life, so what you trim is what you live with. Go slowly, a few millimetres at a time, and point cut throughout. Asian fringes grow back fast, but a fringe cut too short needs weeks to recover.
How to Add Layers to Thick Asian Hair
Layers in Asian hair are worth doing, but they need to be placed deliberately. The hair’s natural density means poorly positioned layers don’t blend quietly; they create visible sections that sit at odds with each other.
1. Face-framing layers
Take a section from the front hairline on each side. Hold it at a 45-degree angle away from the face and cut on a diagonal, longer toward the back, shorter toward the face. This pulls focus toward the features without dramatically changing the overall length.
Resist the urge to start these layers high. Face-framing layers that begin above the collarbone on dense Asian hair tend to create a triangular outline that adds width rather than shape. Starting them at the collarbone or below gives a softer, more flattering result.
2. Long layers through the back
Gather the hair into a ponytail directly at the crown and hold it straight upward. The hair that falls outside your fingers when the ponytail is held vertically represents your natural layer differential; trim straight across the gathered ends.
The height of the ponytail controls the degree of layering. A ponytail held at 90 degrees gives moderate layers. Higher means more layering, lower means less. Start at 90 degrees and work from there.
How to Finish and Style Asian Hair After Cutting
Go around the perimeter one more time with point cutting
Once the cut is done, do a final pass around the entire perimeter with point cutting. Not to take more length off, just to refine the edge. On Asian hair, this last pass is the difference between a cut that looks polished and one that looks slightly rough, even when the shape itself is right.
Drying the hair well is half the result
The cut tells the hair where to go. The blow-dry locks it there. For bobs and shorter styles, a round brush with low-to-medium heat rolling the ends inward or outward, works with the graduation already built into the cut. For longer hair, a paddle brush directing everything downward keeps the surface smooth and the weight sitting evenly.
If you air-dry and don’t own a blowdryer, mention it to your stylist before they cut. A cut designed to be blown dry and a cut designed to air-dry look very different, not because one is better, but because the internal structure needs to be adjusted. A good stylist will adapt without being asked twice.
When Thinning Shears Help (And When They Don’t)
Thinning shears are a finishing tool. Not a solution for bulky hair, not a layering shortcut, not something to reach for because the hair feels thick. Used correctly, a few careful passes through sections from mid-length down, shears pointing downward, they add a soft texture that’s hard to get any other way.
Used too aggressively, or too close to the roots, and the damage is real: flyaways that refuse to lie flat, a top layer that looks sparse and frizzy, and a result that takes weeks of growth to settle. If you’ve ever walked out of a salon with hair that felt oddly puffy or unmanageable, overzealous thinning shears were almost certainly involved.
Common Mistakes When Cutting Asian Hair
- Cutting wet instead of damp — the hair stretches, and you end up shorter than intended.
- Straight horizontal cuts without point cutting — creates a hard, blocky perimeter.
- Skipping internal weight removal — the hair looks heavy and dense instead of shaped.
- Over-thinning near the roots leads to frizzy flyaways that are almost impossible to control.
- Face-framing layers that start too high — add width instead of shape.
- Working in sections that are too large, accuracy disappears, and unevenness becomes invisible until the hair is dry.
- Not checking balance before cutting the sides — small errors in the back become very obvious once the full cut is dry.
Conclusion
Asian hair doesn’t need to be wrestled with. It needs to be understood. The density, the weight, and the way it falls are all features that produce incredible results when the cutting technique works with them. Point cutting, internal weight removal, careful sectioning, a considered finishing pass, none of these are complicated, but each one matters.
If cutting your own hair feels like more than you want to manage, or if you’ve had one too many disappointing salon experiences and want a result you can actually rely on, our hair salon in Orchard would love to show you what a good Asian haircut really feels like.
FAQs
1. Why does my Asian hair look blocky after cutting?
The most common reasons are cutting straight across without point cutting and skipping internal weight removal. A blunt perimeter reads very heavy on dense hair, and without thinning the interior, the shape sits flat instead of moving. Point cutting the edges and removing weight through the mid-length interior softens the finish immediately.
2. How do I thin out thick Asian hair without creating frizz?
Work from the mid-length down, never near the roots. Use slide cutting with sharp scissors for gradual weight removal, or thinning shears sparingly, two to three cuts per section, pointing downward. Thinning too close to the root removes structural support and causes frizzy flyaways.
3. Is layering good for thick Asian hair?
Yes, but only when placed correctly. Long, low layers remove weight without creating bulk. Layers that start too high can create a triangular shape and make the hair look wider rather than shaped. Placement matters more than the number of layers.
4. How should I cut Asian short hair for men?
For Asian short hair on men, point cutting and internal weight removal prevent blocky, heavy edges. Working in small sections and following the natural fall of the hair ensures a polished, natural look, whether for a classic short cut or a textured style.
5. What haircut works best for thick, straight Asian hair?
Graduated lobs, longer bobs, and long hair with controlled internal layering work particularly well. These shapes manage density while keeping movement. Heavy one-length blunt cuts without weight removal tend to look boxy and sit flat, especially if air-dried.